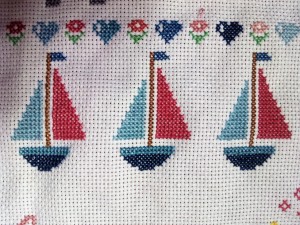
Un cuadro de nacimiento marinero/ A marine childbirth picture


Hola a todos,

Hello everyone,

como veis estos días tengo algo más de tiempo libre y de WiFi, así que os enseño otro de los proyectos de este verano. Mi madre me había encargado un cuadro de nacimiento, bordado en punto de cruz, para la hija de unos amigos que viven en Galicia. No había tenido tiempo de hacerlo hasta ahora, así que revisando revistas punto de cruz antiguas con números especiales para bebés, me encontré con este formato…

These days I have a little bit more free time as well as WiFi, so I show you another of my summer projects. Mi mom had ordered me a childbirth cross stitch picture for the baby girl of her friends who live in Galicia. I didn’t have the time to do it until this summer, so I was looking through some old cross stitch magazines with special baby pages when I found this…

Es un típico cuadro de nacimiento de la revista «Labores del Hogar» de hace unos 16 años…madre mía cómo pasa el tiempo…

It was the typical childbirth cross stitch picture from «Labores del Hogar» magazine and the entry was 16 years old…you can really see how time passes…

Para adpatarlo a la recién nacida y como su familia vive en la costa, tuve claro que los motivos marineros debían aparecer en el cuadro, junto con otros motivos más clásicos de cuadritos infantiles. Eché mano de un libro recurrente como ya conoceís los seguidores de mi blog. Y es que me encanta…lo bordaría entero…

In order to adapt it to the babygirl, and as the family lives near the cost, I was aware that the marine motifs must appear in the picture, next to more classical baby ones. So, I grabbed my favourite marine cross stitch book as many of my blog followers know. I really adore it…I could even embroider it all…

¡Manos a la obra! Empezamos por marcar los bordes y unos pequeños detalles…

Let’s do it! We begin with the edges and some tiny details…
Faros en tonos de azul marino y rojo

Lighthouses in navy blue and red shades

Conjuntamos los tonos de azul del borde con los faros

Matching blue shades from the edges with the lighthouses

Y empezamos con los detalles personales del nacimiento de la pequeña: el peso, la medida, la fecha y la hora …

And now, we go with the personal details from the babygirl birth: weight, height, date and hour…

Corazones, ovejas, flores, conejos y ositos, biberones y sonajeros, acompañados de barquitos, faros y peces…

Hearts, sheeps, flowers, bunnies and teddy bears, rattles and baby bottles, accompanied by little ships, lighthouses and fishes…

Todo en perfecta armonía de colores y formas, sin perder de vista que se trata de un cuadro infantil, todo ternura y para rematar, añadimos al borde del cuadro una greca de corazones y hojas, en los mismos tonos de rosa y rojo que han ido apareciendo en los motivos del cuadro…

All combined in a perfect harmony of colours and shapes, without losing sight of the fact that is a childish picture, all tenderness. To finish it, we add  a decorative border with small hearts and another with tiny leaves to the edge of the picture, in the same shades of pink and red that had been appearing during the picture embroidering…

Una mezcla curiosa que ha dado como resultado este maravilloso cuadrito de nacimiento…

A curious mix which has resuted into this marvellous childbirth picture…

Enhorabuena a los papás de Valeria y espero que les haya gustado tanto como a mi bordarlo. ¡Hasta la próxima entrega!

Congratulations to Valeria’s parents and I hope they would have liked it as much as I have enjoyed stitching it. See you in the next entry!

Una manta para papá/ A blanket for daddy

Buenas tardes, queridos amigos del blog,

Good afternoon, dear blog friends,

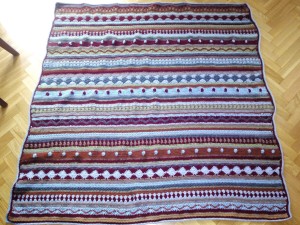
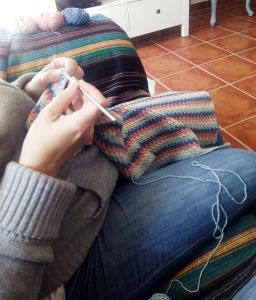
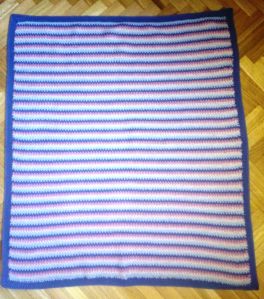
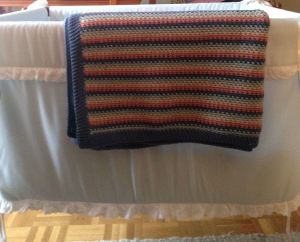
Os pido disculpas una vez más por tardar en publicar de nuevo, pero han sido unos meses muy intensos…Hoy os muestro mi última creación ganchillera. Se trata de una manta de lana, de tamaño no muy grande, para dejar a los pies de la cama o para echarse en el sofá. Pensaréis que me he vuelto loca con el calor que hace, y sin embargo terminé la manta allá por Semana Santa.

I’m sorry for being late in posting a new entry again, but I’ve been busy as a bee during last months. Today I’m showing you my last crochet creation. It’s a wool blanket, not too big, but enough to have it at the feet of your bed or in the sofa. You may think that i’m mad with this hot weather…but the thing is I finished it during Easter holidays.

Os preguntaréis para quién la he tejido esta vez.  El destinatario: mi padre. ¡Con la de cosas que he hecho de ganchillo y ninguna para él! Pues ya es su turno…

Probably, you may be wondering who is the recipient this time. It’s my father. I’ve done loads of things but never for him! Now it was his turn!

Buscando inspiración por internet me encontré con esta interesante web : https://notyouraveragecrochet.com/as-we-go-stripey-blanket/ en la que además tenían la versión gratuita del patrón para imprimir con todas las instrucciones, aunque eso sí…en inglés. Combina un montón de puntos distintos y muchos colores, en rayas que se van repitiendo a lo largo de toda la manta. El patrón es cortesía de Hannah Davis.

Looking for inspiration through the internet, I found this interesting website https://notyouraveragecrochet.com/as-we-go-stripey-blanket/ in which they even had the free version of the patern to print, with whole instructions but in English. It combines a lot of different stitches and colours, in stripes which are been repetaed through the blanket. The pattern is courtesy of Hannah Davis.

Lo primero, elegir la lana y los colores. Lana merina (55%) con mezcla de acrílico para que no pique…Las marcas han sido Katia y DMC. Son muy amorosas. El orden es importante a la hora de empezar, y luego se van combinando colores según el punto empleado.

The first step is to choose the kind of wool and the colours. I’ve chosen Merino wool (55%) with acrylic to avoid itching. The brands are Katia and DMC. They are quite loving. The order of colours is very important at the beginning of the project, but after that you can go on combining them, taking into account the stitch you are using.

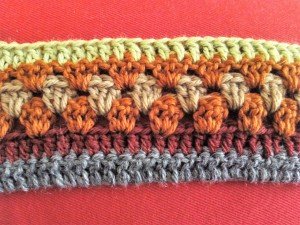
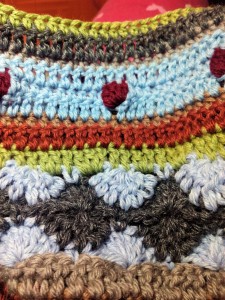
Y aquí las primeras vueltas con puntos altos, granny stripes y comienzo de Catherine’s wheels:

And here you are, the first rows with DC, granny stripes and the beginning of the Catherine’s wheels:

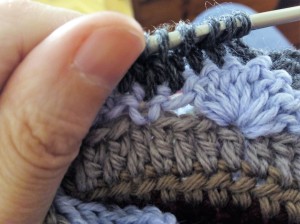
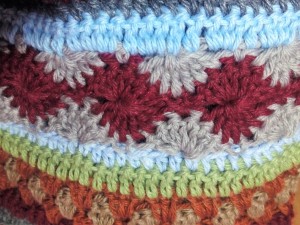
y seguimos avanzando; aquí podéis ver el detalle del punto llamado rueda de Catalina o Catherine’s wheel con dos combinaciones diferentes de colores:

and we continue going on; here you can see the detail of the stitch called Catherine’s wheel with two different colour combinations:

y ahora unas cuantas burbujas o bubbles:

and now some bubbles:

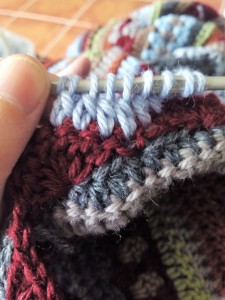
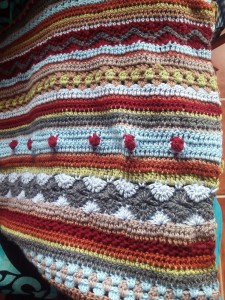
es el turno del punto de estrella o star stitch, ondas y algunas granny stripes o rayas de la abuelita:

now is the turn of the star stitch, some waves and granny stripes:

(revés del punto de estrella/star stitch back)

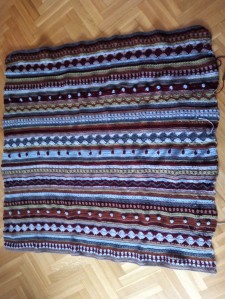
Y así, línea por línea, vuelta por vuelta, terminamos la manta…

And then, stripe by stripe, row by row, we finish the blanket…

y tenemos que pensar en hacerle un borde, que sea sencillo, para no recargarla demasiado. Así que hacemos un borde de punto enano, sencillo pero efectivo.

we have to think about the blanket’s border, something simple in order to avoid being heavy. So, we do a double crochet, easy but effective.

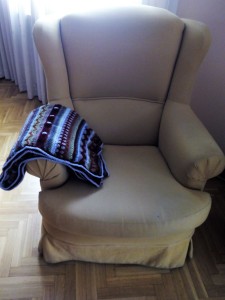
Preciosa, ¿verdad? y además muy calentita y suave. Ahora ya nos podemos relajar en el sofá y tomarnos una buena taza de té. Nos lo hemos ganado.

Awesome, isn’t it? and so soft and warm…Now we can unwind in the sofa and have a big cup of tea. We really deserve it.


Papá ¡espero que te guste! He disfrutado mucho y he estado muy abrigadita este invierno tejiéndola.

Daddy, I hope you would like it! I’ve enjoyed  it a lot  and I’ve been quite wrapped up this winter crocheting it.

¡Hasta pronto amigos puntocruceros!

See you soon friends!

A JUEGO CON TU BEBÉ/ MATCHING YOUR BABY

Hola a todos!

Hi Everybody!

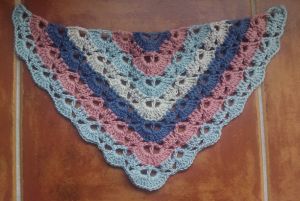
Como continuación de la publicación de la semana pasada, pese al calor, hoy os traigo un chal que hice con la lana sobrante de la manta de Marcos, y que regalé a su mamá, para que vaya a juego con el bebé.

Continuing with last week post, despite the hot weather we are suffering, today’s publication is about a shawl made with leftover yarn from Marcos’ blanket. I gave it to his mother to wear it matching her baby.

Lo hice con el mismo patrón utilizado para hacer un chal de invierno que ya os mostré en anteriores entregas. Lo bueno de este modelo es que se puede usar a modo de chal en primavera/ verano, y en invierno puedes enrollarlo al cuello como bufanda.

I crocheted it with the same pattern I used to make a winter shawl that I showed you in previous posts. The good thing about this project is that you can use it as a spring/summer shawl, but you can also wear it as a scarf during winter around your neck.

En esta ocasión utilicé la lana sobrante de la mantita del bebé, pero con los colores combinados en distinto orden.

This time, I employed the leftover baby’s blanket yarn, however the colours were combined in a different order.


Para rematarlo, hice pruebas con dos tipos de bordes, y escogí el segundo:

For the edge, I made several samples with two different endings and finally I chose the second one:

Y al final, quedó así:

In the end, this was the result:


¡Mamá y bebé a juego!

Matching mom and baby!

Espero que os haya gustado. ¡Buen fin de semana para todos!

Hope you have enjoyed the post. Have a nice weekend!

Ya estoy de vuelta/ I´m back

Queridos amigos de http://www.cruzypunto.com,después de un largo tiempo sin estar por el blog…¡He vuelto!

Dear friends from http://www.cruzypunto.com, after a long time without being in the blog…I’m back!

Disculpadme por estos meses de ausencia debidos a la realización de un máster universitario, así como varios temas de salud familiares. Gracias a Dios, todo se ha solucionado con éxito y oficialmente soy profesora de Educación Secundaria, Bachillerato y FP.

I’m sorry for all these long months in which I’ve been absent from the blog. Due to a Master’s and some family health issues, I wasn’t able to post. Thanks God, everything has been successfully solved, and now I’m officially a Secondary Teacher.

He elegido la mantita para el segundo bebé de mi amiga Cristina como motivo para la nueva publicación de mi blog, ya que su confección me ayudó a relajarme en los momentos de estrés, pero es que además hemos descubierto un nuevo tipo de lana que nos tiene fascinados…una mezcla de algodón y lana de yak de Katia que es todo un bombazo, por su suavidad, textura, ligereza y colores. Juzgad vosotros mismos:

I’ve chosen the blanket for my friend´s Cristina second baby boy as the subject for my new post. Its preparation helped me a lot to unwind during the hardest part of these last months. Besides, we have discovered a new type of wool that keeps us fascinated. It’s a mixture of cotton and yak wool that is a bomb due to its softness, texture, lightness and colours. Just judge by yourselves:

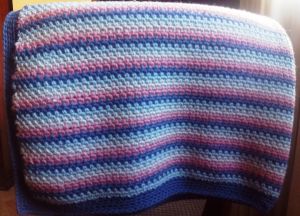
¿Qué combinación de colores os gusta más? La elegida ha sido esta:

Which colour combination do you enjoy more? The chosen one has been this:

El diseño de la manta ha sido sencillo, sin florituras, entrelazando vueltas de puntos bajos combinando colores, y rematando con un borde en el mismo azul empleado para una de las líneas.

The blanket design was simple, without frills, combining colours throughout single crochet rows and finishing with a blue ending.

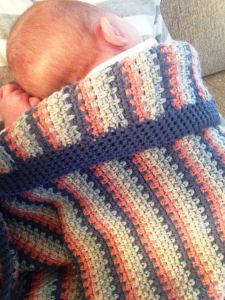
Y el resultado final ha sido una mantita de cuna muy versátil, para envolver al bebé en estos días cambiantes de primavera-verano, donde pasamos del frío al calor, o a las tormentas…

The final result is a versatile crib blanket to wrap the baby in these changing days, when we pass from the cold to the hot stage, from spring days to summer storms…

¡Bienvenido Marcos!

Welcome Marcos!

¡Enhorabuena a Cris y Javi por este regalo inesperado!

Congrats to Cris and Javi for the unexpected gift!

Y a los amigos de este blog, gracias por vuestra espera y paciencia. Me alegra mucho estar de vuelta y seguir compartiendo con vosotros mis pequeñas obras. ¡Hasta pronto!

And to you friends of this blog, thank you for your patience and wait. I’m so glad to be back and be able to share with you all my tiny projects. See you soon!

NAVIDAD 2016

Buenos días queridos amigos de cruzypunto.com.

Good morning dear friends!

Llevaba un montón de tiempo sin asomarme al blog, porque en este tiempo he estado realmente ocupada. He decidido cursar un máster universitario, y casi no me da la vida para nada más…

it has been a long time since I Iast posted here. I am as busy as a bee because I have decided to study a masters. Back to University!

Aunque parezca que cada año llega antes, sí amigos, la Navidad ya está aquí. Por eso, en el post de hoy os propongo varios detalles de decoración navideña que he ido preparando a lo largo del último año. Los podéis hacer para vosotros mismos o para regalar.

Though it seems that Christmas comes earlier every year, it’s a fact, Christmas is here. That’s the reason why today I propose you several examples of Christmas decoration. I have been preparing them through this year. You can do them for yourselves or even to give.

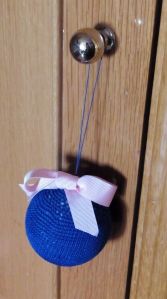
Ganchillo: bolas para el árbol de Navidad en diferentes colores y texturas, tejidas con lana y perlé.

Crochet: balls to hang from the Christmas Tree in different colours and textures, made of wool and pearl cotton.

bola-azul bola-lazo-rojo bola-roja

Estrellas con cuentas de colores

Stars with colour beads

estrellas-cts-rojas

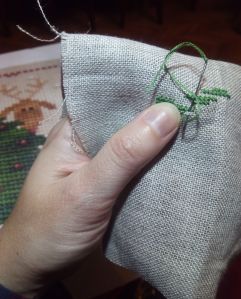
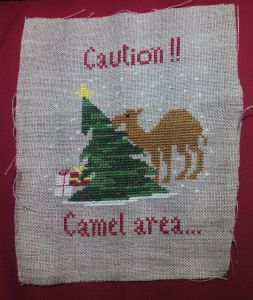
Punto de cruz: un camello que se come el árbol de Navidad. Como podéis ver, el original era con reno, pero aquí en España de eso no tenemos…;) Así que decidí bordar un camello.

Cross Stitch: a camel eating the Christmas Tree. As you can see, in the original pattern there was a reindeer, but here In Spain we don’t have reindeers, so I decided to embroider a camel.

camello-empezando camelo-in-progress camello-entero camello-terminado camello-en-marco

Espero que os hayan gustado estos pequeños detalles. ¡Os deseo a todos que paséis una feliz Navidad!

I hope you had enjoyed them. I wish you al a Merry Christmas!

NAVIDAD EN VERANO

¡Hola! Ya estamos de vuelta queridos amigos de http://www.cruzypunto.com. Espero que hayáis pasado unos agradables días de descanso y desconexión este verano. Pasados estos meses y después de algunas vicisitudes médicas, aquí estoy, deseando mostraros mis proyectos realizados este verano.

Hello everybody! We are back dear friends from http://www.cruzypunto.com. I hope you’d have had a gorgeous period of relaxing and an unwound summer days. Afeter these months and some medical events, here I am wishing to show you some of my projects, which were released last summer.

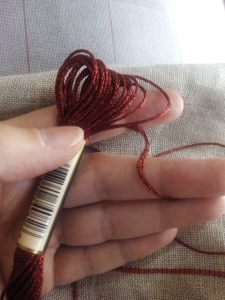
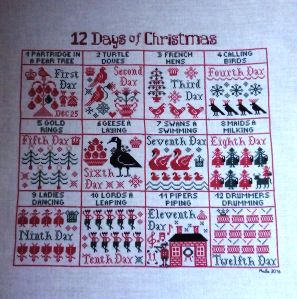
El que hoy os muestro ha sido muy bonito de realizar, y para él solo he utilizado 3 colores: rojo, negro y verde. ¡Muy sencillo y muy navideño! Alguien pensará que no pega mucho hacer proyectos navideños en verano, pero es que el cuadro era muy grande y en verano hay muchos ratos libres para relajarse y bordar…

Today’s project was a kind of a dream to be made, and I have only used three colours to do it: red, black and green. Simple and ideal for the Christmas season. Somebody may think it’s not fair to produce Christmas projects during summer, but the project was quite huge and during the summertime there are plenty of free moments to relax and to embroider…

La idea vino de http://plumstreetsamplers.typepad.com/ donde Paulette Stewart nos deleita con sus preciosos diseños. En las pasadas navidades, ella completó una serie de gráficos gratuitos (12 en total) inspirándose en la canción tradicional inglesa «Los 12 días de Navidad» (https://www.youtube.com/watch?v=PVU_tR0g0fk). Es una canción que se enseña a los niños para que ejerciten su memoria, ya que tienen que recordar una pequeña estrofa para cada uno de los días de Navidad y cada vez que se pasa de día, también hay que repetir las estrofas anteriores.

The inspiration came from http://plumstreetsamplers.typepad.com/ where Paulette Stewart delights us with her beautiful designs. Last Christmas she completed a series of free patterns, twelve altogether, inspired by the traditional English song «The twelve days of Christmas»  (https://www.youtube.com/watch?v=PVU_tR0g0fk). It’s a special song that  children are taught in order to improve their memory, because they have to learn a small verse for each of the 12 days, and each time they pass a day, they must repeat all the previous verses.

el-comienzo el-comienzo-2

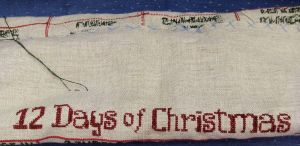
hilo-del-tituloel-titulotitulo-making-ofPaulette diseñó un motivo para cada día, y lo colocó dentro de una cuadrícula. Pues bien, yo le añadí el título de la canción y la letra de la estrofa para cada día.
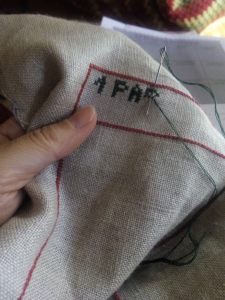
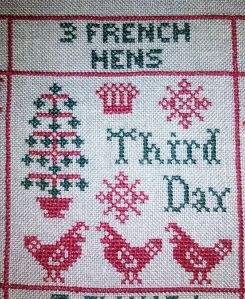
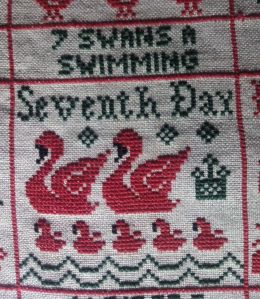
Paulette created a pattern for each day framed inside a grid, and I have added the song’s title and the lyrics of every verse for each day.

letras-en-verde letras-en-verde-2

Y aquí vienen… los 12 Días de Navidad…

and there they come…the 12 Days of Christmas

1o-dia 2o-dia 3o-dia

4o-dia 5o-dia 6o-dia 7o-dia 8o-dia 9o-dia 10o-dia

11o-dia 12o-dia

¡y ahora el gran final!

and the grand finale!

12-dias-de-navidad

Estoy deseando ver cómo queda enmarcado…Espero que os haya gustado y gracias a Paulette Stewart por compartir generosamente sus diseños.

I’m looking forward to see it properly framed! I hope you have enjoyed it and I’m really grateful to Paulette Stewart for sharing her awesome designs so generously.

¡Hasta pronto!

See you soon!

Simplemente Mayo/ Simply May

¡Buenos días a todos!

Good morning everyone!

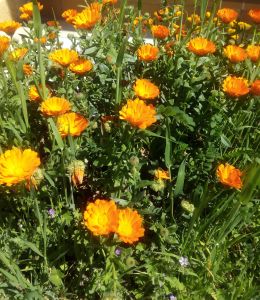
Parece mentira pero ya ha llegado el mes de Mayo. Mayo en España es el mes en el que celebramos el día de la madre, las primeras comuniones, es el mes de la primavera y de muchas fiestas por todos los pueblos y ciudades de nuestra geografía.Un denominador común en todas estas fiestas son las flores. Todo vuelve a la vida, todo renace…Así estaban las flores de mi jardín este fin de semana…

It may seem incredible but the month of May has arrived. May in Spain is the month in which we celebrate Mother’s Day, the first Communions. It’s the Spring month and a lot of local festivities around our villages and cities. All of these have one thing in common: the presence of flowers. Everything blossoms and comes back to life. So were my garden flowers last weekend…

jardín 1 jardin 3 jardin 5 jardin 2 jardin 4


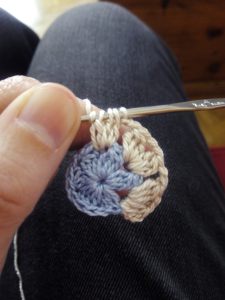
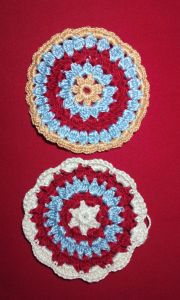
Por eso decidí hacer estos motivos a ganchillo, inspirándome en las flores, todos diferentes, y combinando colores suaves con otros más fuertes.Rojo, crudo, ocre, azul cielo, verde, rosa, beige, forman una delicada paleta para cada flor que es única.

I decided to crochet some patterns taking inspiration from flowers. All the patterns are different mixing up soft and strong colours. Red, ecru, ochre, light blue, green, pink and beige compose a delicate pallete for each and unique flower.

flor inicio FLORES


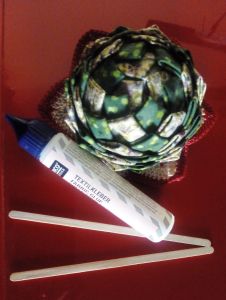
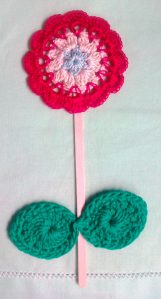
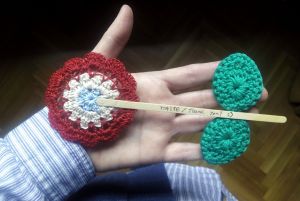
Después tejí unas hojitas con dos formas distintas, y pegué la flor y las hojas en unos palitos de madera planos, utilizando un pegamento especial para tejidos. Para que no se estropearan al entregarlas, las envolví en bolsitas de celofán transparente¡Así han quedado de bonitas!

Next I crocheted some leaves using two different patterns and I glued them to some flat wooden sticks, employing a special glue suitable for fabric. In order not to ruin them during their delivery, I wraped them into transparent cellophane bags. And here’s the result!

hojas

pegamento

2 FLORES CON PALO

flor

flor Tami

flor emapq 2

flor empaq 1

flor empaq 3

Se las he regalado a seis mujeres que me han ayudado y me siguen ayudando muchísimo.»Dígaselo con flores». Pues ahí está dicho.

I have given them to six women that have helped me enormously and that continue helping me a lot. «Tell it with flowers». It’s already told.

Hasta pronto amigos y gracias por estar ahí cada semana.

Thanks for being there every week! See you soon!


CARICATURA EN PUNTO DE CRUZ/ CROSS STITCH CARICATURE

Buenos días!

Good morning!

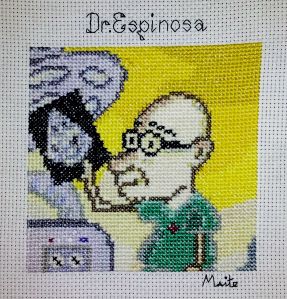
hoy os enseño un pequeño obsequio que le he hecho a un amigo mío. Mi amigo es ginecólogo y hace poco tenido que pasar por cirugía, aunque ya está casi totalmente recuperado. La idea se me ocurrió al ver la foto de su perfil de whatsapp; era una caricatura regalo de una de sus pacientes…

Today I bring you a little gift that I have done for a friend of mine. He is a ginecologist, and he has gone through surgery recently, though he is almost completely recovered. The idea of this project came to me while I was looking at his whatsapp profile picture. It was a caricature given by one of his patients…

espinosa original

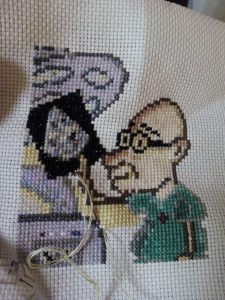
Me pareció buena idea intentar hacer el mismo dibujo adaptándolo a punto de cruz. Con ayuda de mi aliado el «Pc Stitch» hice un gráfico y sobre la marcha lo fui ajustando algún detalle.

I thought it would be a great idea to design the same drawing but adapting it to cross stitch. I designed a pattern with the help from my favourite ally «Pc Stitch». I went on with several adjustments on the go.

espinosa 1

espinosa 2

espinosa 3

poco a poco va tomando forma…

the project was taking shape little by little…

espinosa 3.5

lo completamos con el fondo

we filled it with the background

espinosa 4

espinosa 5

Luego lo personalizamos con su nombre

Then, I personalized it with his name

nombre

lo firmé y lo planché

I signed and ironed it

espinosa acabado

y ¡listo para entregar!

and it’s ready for delivering!

espinosa fin

La verdad es que cada vez voy teniendo más soltura con el «PC Stitch» y obtengo buenos resultados. Espero que le haya gustado y ¡a vosotros también! Hasta pronto.

To be honest, each time I’m feelling more confident with «Pc Stitch» and I’m obtaining good results. I hope he had enjoyed it and you too! See yoiu soon!

FLORES EN LA COCINA/ FLOWERS IN THE KITCHEN

Hola amigos,

Hi friends!

hoy os propongo un diseño propio realizado con el programa para ordenador «pc stitch», y posteriormente bordado en punto de cruz, para alegrar un poco vuestra cocina.

Today my proposal is my own design produced with the «PC Sitith» computer programme, and finally cross-stitched to enlighten your kitchen.

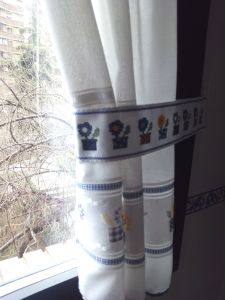
La idea surgió después de cambiar las ventanas de mi casa el pasado verano. Como las nuevas eran de tamaño diferente, tuve que adaptar las cortinas que tenía. Para que entrase más luz en la cocina, se me ocurrió confeccionar unos recoge-cortinas, bordados en punto de cruz, y decorados con una cenefa inspirada en el dibujo de mis cortinas. Lo primero fue realizar el diseño:

The idea came to me after renewing my home windows last summer. The new ones had a different size, so I had to adapt the curtains I had. To let more light come in, I thought about making some curtain holdbacks, embroidered in cross stitch, and decorated with a border inspired by the same decoration my curtains had. Firstly I drew the design:

cortina

pc 1 pc 2

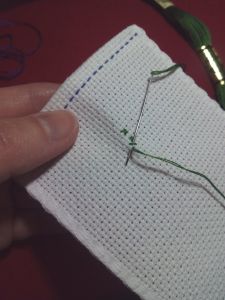
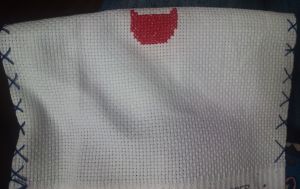
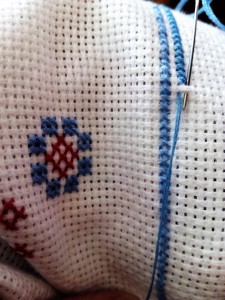
Luego, compré un entredós blanco especial para bordar, y aseguré los bordes mediante un pespunte azul para que no se deshilachara.
Then I bought a special white border suitable to  embroider on it and after that I held its edges sewing a blue backstitch to avoid the cloth from fraying.

empezando 1

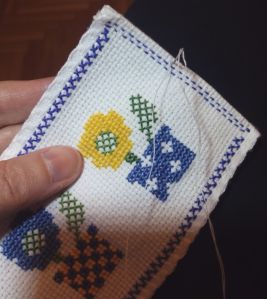
A continuación fui bordando la cenefa que había diseñado. Para ello tuve en cuenta que cada uno de los recoge-cortinas tenía que llevar el dibujo orientado hacia cada lado de la pared.

Next, I went on embroidering the pattern I had designed. I took into account that each curtain holdback had to have the pattern orientated towards each side of the wall.

empezando 2

IMG_20160121_161525 RECOGE Cortinas izdo 1 IMG_20160122_103532

Cuando alcanzamos la longitud deseada, en mi caso han sido 8 macetas, confeccionamos un borde sencillo ajedrezado en azul oscuro.

When we reach the desired length, in my case it was 8 flowerpots, we sew a simple, dark-blue checked edge.

cosiendo borde cosiendo borde 1

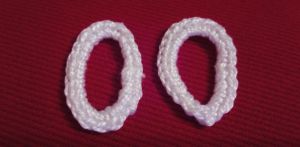
Para terminar, unimos los dos bordes con hilo blanco. También he hecho unas anillas de ganchillo blancas, para sujetar los recoge-cortinas a la pared con unas perchas adhesivas…

To finish our project, we sew the two edges together with a white thread. I also made two white crocheted rings, to fix the curtain holdbacks to the wall using some self-adhesive hooks…

pegando cinta anillas ganchillo

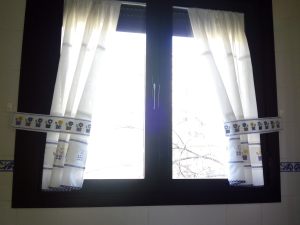
y aquí tenéis el resultado…

and here you have the result…

cortinas puestas 2 cortinas puestas IMG_20160203_132932 regoge cortinas dcho puesto recoge cortinas dcho puesto 2 recoge c izdo puesto

¡A mi me encanta! ¿Y a vosotros?

Nos vemos en breve…¡cuidaos mucho amigos!

I really adore them! and you?

See you soon and take care friends!


ENSEÑAR DESDE EL CORAZÓN/ TEACHING FROM THE HEART

Hola amigos,

la semana pasada se celebró el día del maestro. Tradicionalmente coincidía con la celebración de Santo Tomás de Aquino y era un día festivo tanto para los alumnos como para los maestros. En la actualidad, ya no hay día festivo, pero en mi opinión deberíamos agradecer cada día a los maestros la excelente labor que hacen nuestros hijos.

En la mayoría de los casos, no sólo les enseñan lo que viene en los libros, sino también a enfrentarse a las distintas situaciones que la vida les va a plantear, educando en valores, con valores y desde los valores. Por ello, decidí realizar este proyecto para regalárselo a la maestra de mi hija. A ella le encantan las ranitas, así que con un poco de inspiración de Pinterest…

Hello friends!

Last week we celebrated teacher’s day. Traditionally, it was celebrated on Saint Thomas Aquinas day and it was a public holiday for teachers and pupils. Nowadays, it’s not a public holiday. Despite this, we should thank our teachers every day for the excellent work they do with our children.

In the majority of cases, they don’t only teach what is written in the school books, but they also show them how to deal with the situations that life is going to present. They provide education in values, with values and from values. That’s the reason I’m doing this project, to thank my daughter’s teacher. She adores little frogs, and with a little inspiration from Pinterest…

rana Anabel 1 rana Anabel 2 rana Anabel 3

rana Anabel 4

y luego le añadí una frase que resume muy bien lo que antes os comenté…

and then I added a sentence that resumes quite well what I told you before…

«Enseñar desde el corazón»/ «Teaching from the heart»

rana Anabel 5

insertamos la tela en el bastidor y listo!

we insert the embroidered cloth in the frame and it’s ready!

rana Anabel 6

¡Gracias maestros!

Thank you teachers!